Part 5: Writing your note and leverage rich-text formatting
This article covers the different ways to write a draft note and use shortcuts for formatting.
Table of contents:
- Overview
- Workflow Instructions
- Starting a new draft
- Writing a visit note
- Rich-text formatting with shortcuts
- Workflow Instructions
- Additional Reading
Overview
The instructions below cover a wide range of ways to write a visit note in Note 2.0. You don’t need to use all of these workflows; rather test out and pick the ones that feel most comfortable and efficient for you.
Workflow Instructions
Starting a new draft
-
Open the patient’s chart.
-
At the top of the chart, click the Visit Note button and select Visit Note 2.0 in the dropdown menu.
- Click on the patient's name from their appointment today to open a Visit Note 2.0 draft if you are using Note 2.0 with the visit note automation feature.
-
A new draft note will open on the right-hand side of the chart.
Addressing Clinical Reminders
Review the Clinical Reminders at the top of the visit note draft to address/dismiss any relevant reminders.
Important: Clinical Reminders are only available for Health Maintenance measures and customers using custom Care Gaps at this time.
Writing a visit note
Using a template
In Note 2.0, you can export a template that was created with Elation’s legacy Visit Note Template feature or created with our new Template 2.0 feature. (Click here to learn more about how to create the new 2.0 templates.)
Multiple templates (both legacy and new) can be applied to the same visit note draft. The contents of the template will simply add to what’s already been documented in the draft.
|
Option 1: Export a legacy template |
|
|
|
|
Option 2: Export a note 2.0 template |
|
|
If you haven’t written anything in the draft yet:
If you’re adding a note 2.0 template to a draft that already has content:
|
|
⚠️ At this time, you cannot link a ‘2.0 template’ when setting up visit note automation. |
Typing directly into the note
You can place your cursor into any text field within a block or outside of a block to type new content.
Creating a text field outside of a block
|
Option 1: Add a text field above or below a block |
|
|
|
|
Option 2: Add a text field below a block |
|
*Note: If there is no text in the block, pressing return/enter will delete the block. Enter a space in the block before you press return/enter to prevent the deletion. |
|


Importing content from outside the note
For the blocks that are associated with the Subjective, there are a few workflows to transfer data from the Clinical Profile to the draft note.
|
Option 1: Use the import button found at the top of the block |
||
|
Note: Only certain blocks will feature an import button.
|
|
|
|
Option 2: Insert a block whose name ends with (from Clinical Pr) into the note |
||
|
Note: This version ending with (from Clinical Pr) is only available for certain blocks.
|
|
|
|
Option 3: Initiate an export from the Clinical Profile |
||
|
|
|
| Option 4: Applying a Dynamic Macro | ||
|
|
|


Using the + button in certain blocks
The allergies, reconciled medications, and assessment & plan blocks have a + button that allows you to simultaneously add structured information to the draft note and Clinical Profile.
|
|

Note: The Family History block also has a + button, but it can only be used to add information to the note daft.
Inserting patient demographics into standard blocks or text fields
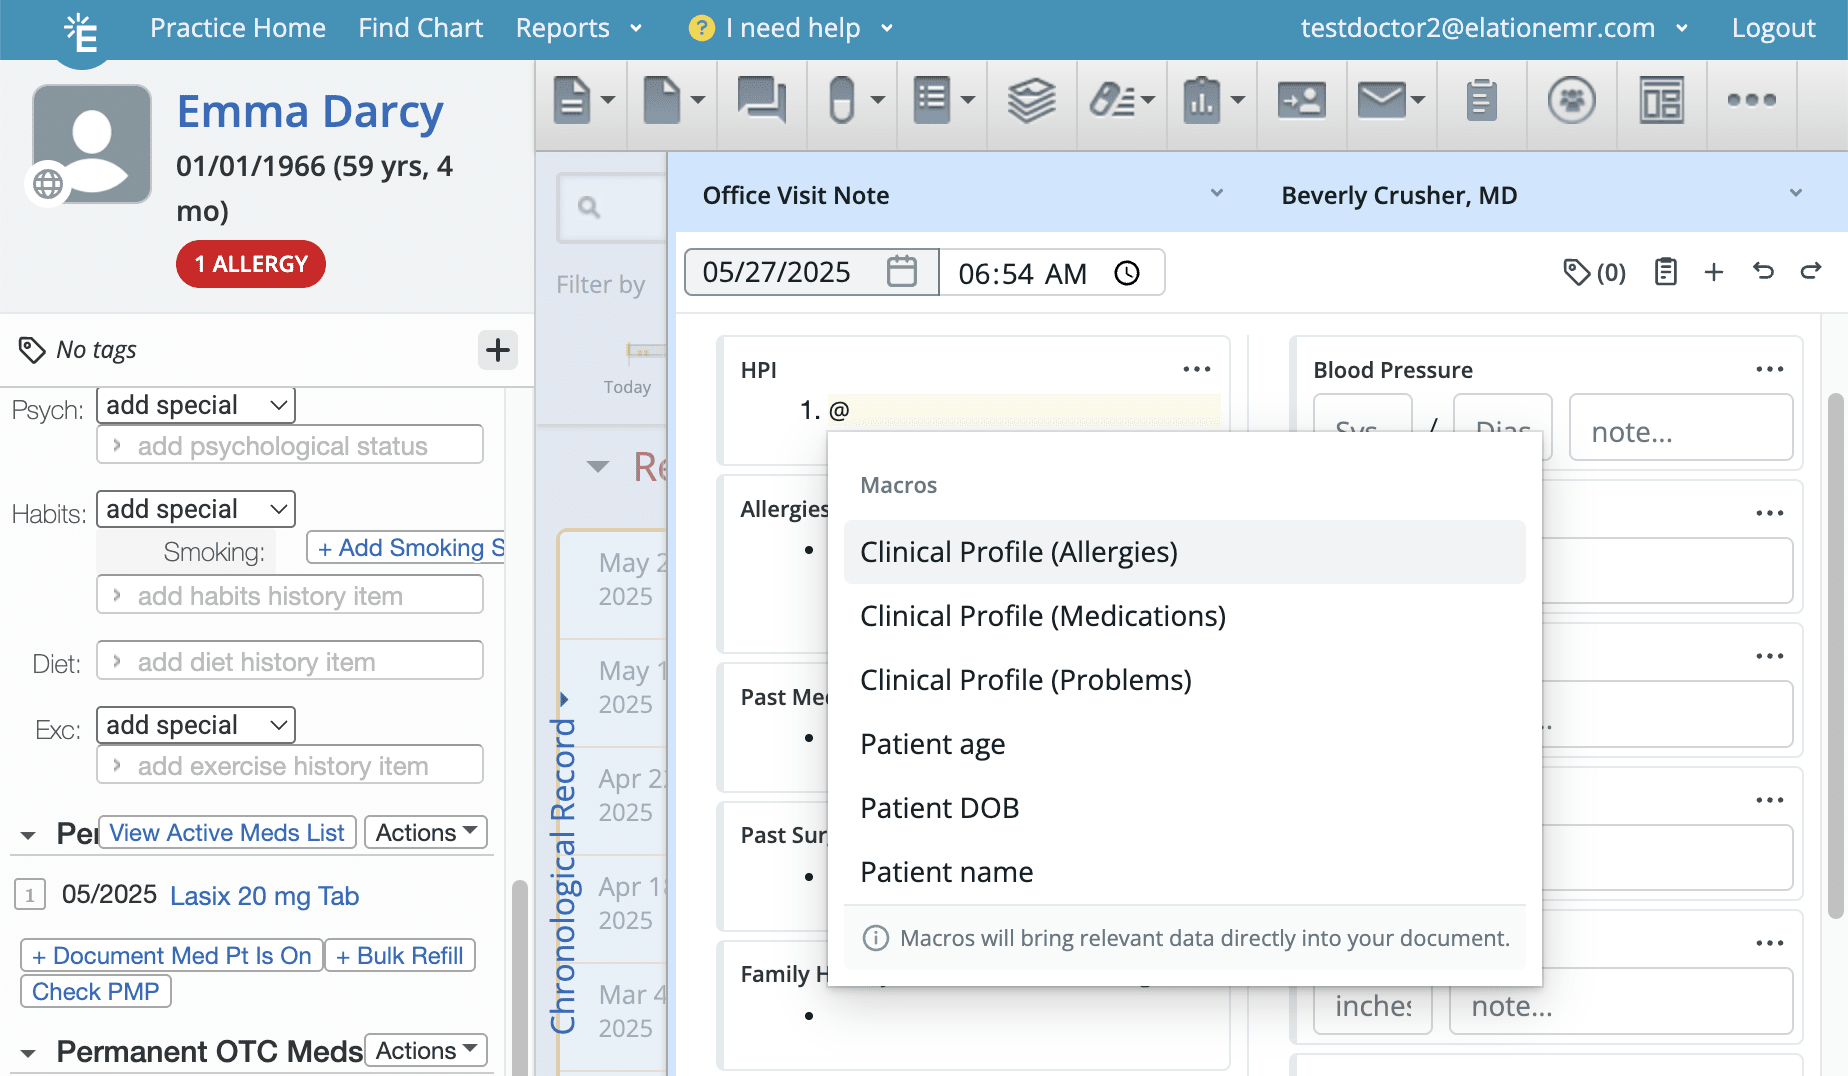
Use the @ shortcut to insert any of the following patient demographic data into a standard block or text field:
-
- Patient age
- Patient's age at the time of visit.
- Patient DOB
- Patient's Date of birth.
- Patient name
- Patient's Legal first name, Middle name & Legal last name.
- Patient age
| ⚠️ Dynamic macros cannot be used in custom blocks, Vitals fields, structured PE and ROS fields or anywhere outside of the Note 2.0 draft or template builder. |
Deleting content from your note
Aside from pressing the Delete or Backspace button to delete individual letters, you can also use the methods below when appropriate.
|
Option 1: Use buttons to remove an entire block. |
|
|
|
|
Option 2: Highlight content to delete |
|
|
|


Copy forward a signed 2.0 visit note
- In the Chronological Record, locate the signed visit note.
- Click the Actions menu and select Export to New Note (All Sections).
- A new draft will appear with the contents of the prior visit note.
|
⚠️ You can only copy forward a Note 2.0 visit note into a Note 2.0 draft (i.e. you cannot copy forward a legacy note into a Note 2.0 draft). |
Rich-text formatting with shortcuts
Within any text field (inside or outside a block), you can use the following keyboard shortcuts to achieve more detailed formatting.
|
Action |
Steps |
|
Create a heading |
Press the # key + space key + your heading text. |
|
Bold |
Ctrl/command + b |
|
Italicize |
Ctrl/command + i |
|
Bold and Italicize |
Ctrl/command + b + i |
|
Undo |
Ctrl/command + z You can also click the button at the top of the note. |
|
Redo |
Ctrl/command + y You can also click the button at the top of the note. |
|
Copy |
Ctrl/command + c |
|
Cut |
Ctrl/command + x |
|
Paste |
Ctrl/command + v |
|
Create a bulleted list |
Press the dash key - followed by space. Use the Tab key to indent. Press Shift + Tab to un-indent. |
|
Convert an empty bullet to a paragraph |
Press the Enter key. |
|
Create a numbered list |
Press a number + . + space key Use the Tab key to indent Press Shift + Tab to un-indent |
|
Convert an empty numbered list to a paragraph |
Press the Enter key |
|
Move cursor to the start of a line |
Ctrl + A |
|
Moving between blocks |
Press the up ↑ or down ↓ arrow. |
|
Select all contents in the note |
Command/Windows key + A |
Additional Reading
-
Note 2.0 - Part 3: Setting up a draft note with blocks
-
Note 2.0 - Part 4: Creating 2.0 templates